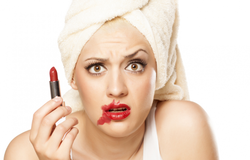
I've always been a lipstick girl, through and through. Gloss just seemed like an after thought to lip color. I mean, if I'm going to put color on my lips, I want to see it. And the texture? Why would you want to put that goopy, sticky, super shiny goo on your lips?! I tried so many brands and formulas but still returned to my roots that lipstick was the best. But then I went to Ulta.... and tried these:
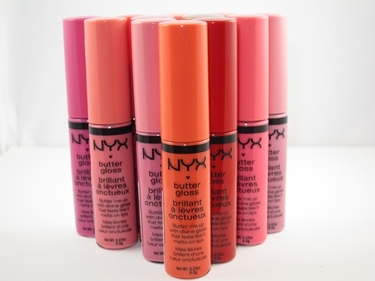
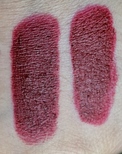
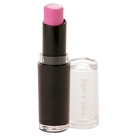
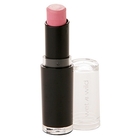
 NYX Butter Glosses 
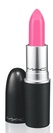
I had heard so many good things about them and I'm such a sucker for bright colors that I gave in, and boy am I glad I did! They give just the right amount of color, not sticky, smells like candy, and goes on "like butta"! I loved all the colors and I think it was because I have a lipstick in about every bright color you can think of, but I restrained myself and went with some neutral pinks for those casual makeup days. Here is the color selection: (there are also some limited edition colors that just came out this year- this is the permanent line) 
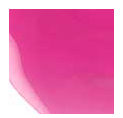
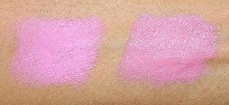
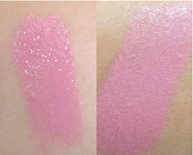
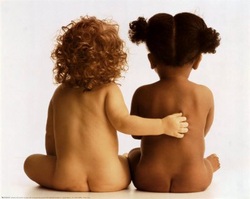
I picked up Vanilla Creme Pie, which is a great natural pink that gives you that soft pink pout you find on the lips of babies- I think I loved it because it reminded me of my daughter's pink pout! I give these butter glosses two thumbs way up and a big puckered kiss for their amazingness!! These will definitely be making an appearance on my ! essentials page Have you ever tried a makeup product you never thought you would like and became a believer? I don't think I'll ever judge a product again based on past experiences- thats the beauty of makeup, always trying new things because you never know what you might find! And for those who found humor in my reference to Star Wars, thank you and you're welcome ;)
0 Comments
As promised, here's part 2 of my affordable dupes for high end products. Enjoy! NARS Blush This NARS blush is probably the most sought after and loved blush in the beauty world! It's the perfect combination of peach and pink tones with a hint of shimmer. Where the purpose of its uncommon and might I say, kinda off the wall, name comes from, I don't know, but nevertheless, it's a favorite! For this blush, I actually found two blushes that could pass as dupes: Here are the swatches side by side- what do you think? MAC Blacktrack Fluidline Liner One of the most popular eyeliners from MAC, this eyeliner is a basic black gel liner.
Basically, their both very black and creamy, making them easy to apply. However I find that the MAC liner dries out very quickly compared to the Maybelline liner, which means that the Maybelline liner will last you much longer. Price difference: MAC Fluidline-$16, Maybelline- $8.99. MAC Lipsticks Even though MAC lipsticks hold a special place in my heart, if I can find the same color and formula in a more affordable option, then I'm all over it! MAC lipsticks are sometimes hard to find dupes for because they carry some pretty unique colors, but after some scavenger hunting through my own collection and trying out colors at the drugstore, I've come up with a list of some great alternatives for those who may have fallen in love with a certain MAC lipstick. but just not with its price tag! ($16).
And the list goes on and on! Wet n Wild is a great option when you want to save serious money on lipsticks, especially when you're wanting to buy a MAC lipstick. The funny thing is, I own most of these MAC lipsticks, yet I want to own the dupe as well! The only difference in comparing these Wet n Wild Mega Last Lipsticks with the Mac lipsticks is that the Mega Last lipsticks come in a matte finish (no shine) and the others vary from matte to creme sheen. So if you want it to look creamier, add a gloss on top. Or if you want to remove the shine, just blot with a tissue or place a tissue over lips and apply powder over tissue with a powder brush for instant matte lips. It's always fun to do these kind of posts! Saving money while still getting great products is one of my favorite things about makeup. I might just continue these affordable dupe posts, so stay tuned!
I know what you're thinking- she's actually telling us to spend money on expensive products?! Yes, drugstore makeup is my absolute favorite, but sometimes there's a reason why a product is hailed as a must have and is worth its hefty price tag. Though rare as this occurrence may be, I feel these products deserve to be recognized as some of the best high end products worth splurging on (although you know I must have a drugstore comparison or dupe stored somewhere in my encyclopedia of makeup!) Here they are: MAC Lipsticks ($16): If you've visited my essentials page (and you should!) you already know how much I love these lipsticks. Available in many finishes and color ranges, these lipsticks are known for their many unique colors. Although there are many dupes out there for many colors, getting an exact shade and finish comparable to MAC is sometimes hard to do. I love lipsticks so I don't mind spending a little more on these lipsticks because of their quality. Make Up Forever HD Foundation ($42): If you've never heard of or tried Make UP Forever products, let me give you a little history behind the brand. Originating in Paris, this brand was created as long lasting makeup for performers who needed waterproof and long wearing makeup, such as swimmers and dancers. This brand is all about makeup that stays put no matter what! And this foundation is just one of their many examples of how well their makeup lasts. Hailed as the must have foundation for brides, this foundations gives an airbrush appearance, making you're skin look natural but still providing a decent amount of coverage- think your skin but better! It dries to a satin finish, neither too matte or too dewy, the perfect finish for flash photography. I would definitely recommend this as a special occasion foundation, unless you can afford it then by all means wear it everyday!! You can find this product on my essentials page. Urban Decay Primer Potion ($20): A favorite for years among beauty gurus and makeup lovers alike, this primer is hailed as one of the best primers to bring out the intensity of your eyeshadows and make them last all day long. In my experience, I have drier eyelids since I have dry skin, so although I didn't see a big difference in using this product, I have heard from many others that it's amazing for oily eyelids. So if you fall into that category, give it a try! MAC Paint Pots ($20): These little pots are the magical bases that create some of the best eyeshadow looks. Also a favorite among beauty gurus, these paint pots are intended to be cream eyeshadows that do not crease and are long lasting, but what they are best known as are eyeshadow bases. The two most popular colors are Soft Ochre and Painterly. Soft Ochre has a yellow undertone, which is great for those with yellow to olive skin tones; Painterly has a more pink undertone, which would suit those with a more pink or red undertone in their skin. A little goes a long way, so your $20 will be well spent! MAC Pro Long wear Concealer ($19): Long wearing, doesn't crease, and provides full coverage- everything you need in a great concealer. With its thick formula and high pigmentation, very little goes a long way! Definitely a product I would recommend for photo shoots and weddings. You can also find this product on my essentials page. Eve Pearl Salmon Concealer ($36): Although I feel a little "iffy" on spending so much on a concealer, this product is hailed by makeup artists around the world as one of the best concealers for dark circles and discoloration. A salmon concealer works great for darkness under the eyes-that purple-lish hue that many women get as they get older or through hereditary genes. The peach tone in the salmon concealer cancels out the purple and creates an even skin tone appearance. Just like the MAC concealer, this product has a high coverage formulation which means you use less of it during each application. A great product to have in your kit for those who do professional makeup or freelancing. Do you have products you would add to the list? I love learning about products others recommend as "must haves" to add to my makeup arsenal!
I consider myself a drugstore diva- I love using drugstore makeup because I believe that many products offered are great at what they do, and provide the same if not better results than their higher end competitors. Plus, saving money on makeup is a must for me because I love buying it! There's hidden gems found in so many brands at the drugstores and other retailers that offer exceptional makeup and affordable prices, you just have to look for them. That's the beauty of makeup- exploring different products and finding those you love! So as a beauty maven, I have tried to find some great alternatives to many of the most loved makeup in the world of high end makeup. But don't think that the term "high end" means better quality- although many times it does- however more often than not it just refers to the fact that they are on the "higher end" of the price scale. Here are some dupes for some of my favorite products and others that are comparable to its more expensive companions. 1. Naked Palette 2 and Bh Cosmetics 28 Neutral Color Palette: Ever since the launch of the Naked Palettes by Urban Decay, the craze over neutrals has skyrocketed! I myself own the Naked 2 Palette, which offers a range of warm toned to taupe colored neutrals and I love it! But I also own the Bh Cosmetics 28 Neutral Color Palette and love it just the same! If you're looking for an affordable alternative to either the Naked 1 or 2 palettes, I would absolutely recommend going with BH Cosmetics. Heres what it looks like: BH Cosmetics 28 Neutral Color Eyeshadow Palette: As you can see, it offers many warm and cool toned neutrals, both in matte and shimmer finishes. What I favor in this palette is the quantity of matte shadows compared tot he Naked palettes, which only offer about 2 or 3 in the whole palette. To extended the wearing time of the shadows, using a primer is always useful. Visit bhcosmetics.com for more info and for more great products! 2. Wet n Wild and Urban Decay Dupes: What do you get when you find the exact same color you love from a more expensive brand at the drugstore? A crazy lady at the drugstore doing a happy dance! (at least for me, that's what happens!) Here is what I found: Here's a side by side comparison with colors from Urban Decay: Pretty cool right?! And there's so many more! Wet n Wild offers so many alternatives to Urban Decay eyeshadows because they offer the same pigmentation and buttery smooth application but at a fraction of the cost. 3. Makeup Geek and MAC Eyeshadows: If you haven't heard of Makeup Geek, well you should, and now you do! Started by a lovely lady named Marlena, she started her makeup company with the intention of providing high quality makeup that is comparable or better than the high end products available in the stores. And boy, did she ever! Her eyeshadows are hailed by youtube gurus as some of the best they've ever tried! But the icing on the cake for her eyeshadows is being compared to the company known for its famous eyeshadows- MAC. I own some of her eyeshadows and let me tell you, they are better than MAC! Much more pigmented and smoother in application- and I'm not the only one who thinks so, just watch the countless reviews on youtube claiming the same thing. Check out makeup geek.com to view swatches of all her eyeshadows. There are so many more dupes that I can add to this list but then this post will be too long to handle! Look out for Affordable Dupes Part 2 coming soon. Do you have any dupes to add to the list? I'd love to hear from you!
Happy Saturday everyone! Here's the newest video on my channel using some of my favorite drugstore eyeshadows from Wet n Wild! Check out the full list of products used in the description box and my essentials page for links to where to find the products. Enjoy!! Have you ever tried a beauty product, fall in love with it, only to find out that the company has decided to discontinue it and now you have to scour the entire universe to buy the last ones on the shelf?! (okay, a little exaggerated, but hey, if it's that good, you would do it too!). This has happened to me so many times and have felt so betrayed- like why would they do that? Well, as I was browsing the internet the other day trying to find out if a certain product was still available for sale, I stumbled upon a website called www.buymebeauty.com, which offers products from makeup to skin care to hair care, both high end and drugstore brands, at less than retail prices that have been discontinued or pulled from the shelves due to change in packaging. They offer free shipping on orders over $35 or a flat shipping fee of $4.99, which is great compared to other sites. So go check it out!!
There are some things in life that come our way that make us think "how did I ever live without this before?!!" Well in the world of makeup, beauty products can produce the same reaction. I have tried countless products through the years and have my tried and true from the beginning and some that I've recently found that have changed the way I apply my makeup and have paved the way for awesome makeup days. The creators of these products must have been having a great day when these products were invented! Here are 5 products that have caused me to shout out loud like the lady in the picture "That Is Genius!!" More info on all the products listed can be found on my essentials page. 1. Monistat Soothing Care as face primer: This product always gets me crazy reactions from people when I tell them about it. First off, yes, its a product that shares its name with a product that's intended to treat, a-hem, woman issues, but that's where the similarities end! This is intended to be used as barrier for sensitive areas of our skin-inner thighs, arms, etc- that are prone to chaffing. The main ingredient is dimethicone, a silicone agent intended to provide a smooth barrier that will deter moisture to gather in the areas where applied. All face primers include this ingredient, which is what gives primers their soft feeling and helps in keeping our foundation in place and control oil and sweat from penetrating through. Basically, its the same thing! Except face primers can start anywhere from $10-$30, when this will only cost you $5.99 and will last you a very long time- a little goes a long way! A favorite among the youtube beauty guru community, this is genius! 2. Real Techniques Brushes: Hands down, some of the best brushes I have ever used! Created by the dynamic sister duo Pixiwoo from youtube, these brushes have been revolutionary in the way I apply my makeup and the flawless application they give. These brushes provide a tool for every part of your face, from face to eyes, and are made with excellent handles and the softest bristles I've ever felt! They are super affordable- individual brushes range from $5.99-$9.99 and coordinating sets of 4 for $17. My favorites are the miracle complexion sponge and the powder brush. 3. Cover Girl Outlast Stay Fabulous 3-in-1 Foundation: My absolutely favorite drugstore foundation ever! (even though I've probably said it before with other foundations, but this time I really mean it!) This foundation's long wearing power is amazingly great that I've come to the end of a long day and my foundation has stayed put and still looks as fresh as when I first applied it. It gives great coverage, very buildable, but still gives you that "like skin" look without the appearance of over applied makeup. My favorite part of this foundation is how amazing it holds up in the summer heat and humidity. It works great alone, but pair this with a primer (like the one shown above) and this foundation will be your best friend on those hot summer days! 4. NYC Bronzer in Sunny: A good bronzer with all the right qualities are hard to come by, especially in the drugstore. Before I found this product, my search for the perfect drugstore bronzer felt like a never ending scavenger hunt. But oh, how things have changed since I found it! It's completely matte, finely milled and buttery soft to the touch, easily buildable, and does not leave an orange cast on the face like other bronzers can. What's great about this product is that you can also use it as an eyeshadow. I like to use it as a transition color in my crease when blending darker colors on the lids, or adding some depth to the eye when I don't want to wear a lot of eyeshadow. 5. Wet n Wild Eyeshadows: Holy cow, are these eyeshadows awesome!! I've used these shadows since high school and they are still a favorite of mine! Affordable prices ($0.99-$4.99), great pigmentation, buttery soft, and easy to apply. Comparable to high end brands, I've found many dupes for my more expensive eyeshadows and compare their quality as same or even better as its high end competitors. An absolute must try!! What are your groundbreaking, life changing beauty products? I'd love to know!
Eyeshadows- a simple makeup product that can bring color and dimension to our eyes, or go terribly wrong and make us look like we just got out of a fight and lost! Eyeshadow is one product that is fun to experiment with in color and application, however the simple act of applying eyeshadow is a little more complex than you might think. We must consider eye shape and size, matte eyeshadow versus shimmery eyeshadow, how far up on the eye should you apply it, etc. And then there's the question- what kind of brush should I use? What about those spongey tip things that come with eyeshadows? Here are some tips to use next time you're stumped as to what shadows to use and where to put them: 1. Eyeshadow Finishes: Not only do eyeshadows come in different colors, they also come in different finishes. Think of them as you would when choosing paint for your walls. Do you want your walls to have a flat look, or do you want some shine to them? Eyeshadows come in 3 finishes- matte, shimmer, and frost/metallic.
2. What goes where: Once you know what eyeshadows you want to use, you know must know what shadow goes where on your eye. Here's a diagram explaining the anatomy of our eyelids: For the under brow, you can choose a neutral skin tone color or a champagne color eyeshadow from either the matte or shimmer category. For the crease, a matte shadow works best to create depth in the eye, making it appear deep set and bigger. For the lid, any type of eyeshadow can work, it all depends on what look you're going for. *You can also use eyeshadow as a soft liner instead of using something more dramatic as a pencil or gel liner. A matte shadow works best, most commonly black or dark brown. 3. The right tools for the job: Just as each eyeshadow finish works best on a certain location of the eye, certain brushes work best at applying shadow to the different areas of our eyelids. Shadows often come with sponge tip applicators intended to be used for application. I toss those away because they are only good at one thing- packing on color. They don't provide options for blending or for use in the crease. I would recommend these 4 simple brushes: All brushes can be found on my essentials page The flat shadow brush is used for applying shadow all over the lid. The pointed crease brush is used for the crease, using a windshield wiper motion (back and forth) to create depth in the socket of the eye. The blending brush is to blend away any harsh edges when applying different shadows to the face. Blending is the most important aspect of eyeshadow!! And lastly, the small tapered shadow brush is used for the highlight under the brows and also for a highlight in the inner tear duct. Here are some recommendations for great quality eyeshadows at affordable prices!
So grab a brush and get to blending!! Got any questions, comments, or post ideas? Let me know, I'd love to hear from you!
Need a skin "pick me up"? All you need is a lemon, some sugar and a little bit of elbow grease! Lemons are the natural remedies for opening pores to get that gunk out that's been hiding out all week and detoxifying your skin by killing unwanted bacteria. The sugar acts as the gritty substance that will help in the scrubbing process. You'll have shiny, glistening skin after just one scrub! Here's what to do:
Use this scrub can be done 1-2 times a week for healthy, clean skin!
Everything you need to know about brushes! I share my must have essentials and what every girl needs in her makeup kit to achieve beautiful makeup application, all without breaking the bank! Okay, so the top cartoon is meant to be a joke, but we've all seen that one person with eyebrows that leave us thinking "what the- I mean, is that on purpose or...?" I can not stress this enough- eyebrows are important!! I always say that our eyebrows are the focal point of our faces. It's one of the first things I notice on a person, especially if they have nice full eyebrows (but then I'm just coveting!). I know we are not all blessed with perfectly arched, perfectly full eyebrows- and for those who are, count your blessings! However, that does not mean we are to throw our hands up in the air in defeat. We all have eyebrows, so its not like we don't have something to work with. The problem is that many don't know what to do with their eyebrows, and that's where my "surprised eyebrow friend" from the cartoon above comes in. But once you know the blueprint in finding the right shape for your face and how to groom them, your eyebrow problems will be a thing of the past! 1. Know your face shape: Eyebrows are not a "one size fits all" feature. Eyebrow styles suit some faces better than others depending on that person's shape and structure of their face. Here's a helpful chart to explain this (for reference, I fall in the round category): 2. Find your recommended eyebrow style according to your face shape: So now that you've figured out your face shape, here are some recommendations for each one: Oval: Soft, angled shape. Long: A horizontal line eyebrow would work to stop the face from appearing too elongated, creating the illusion of a "shorter" face. This can help if you have a prominent chin, making it appear to be shorter. Round: A high arch brow would make the face appear longer, causing the eye to look vertical (up and down). Rounded eyebrows only make the face look rounder. Square: This face shape often consists of a strong jawline. To balance out the face, a curved brow with a sharp angle would be a good fit. Heart: To soften the face, a low, rounded brow would make the forehead appear less prominent and balance out the appearance of a pointy chin. Diamond: This face shape is the most angled with a wide section around eyes and temples. To soften the angles, a rounded brow will balance the sharp lines on the face. 3. Find your angles: With brows, there are 3 things you need to know: 1. Where your brow should start 2. Locating the highest point of the brow, and 3. Where the brow should end. Here is a diagram with a description of each area: 4. Get the right tools for the job: So know that you know your face shape and recommended eyebrow shape, you need the tools to start grooming those lovely brows! The two tools I highly recommend are a spoolie and a stiff angled liner brush. A spoolie is a long handle brush with a spiral brush on the end, resembling a mascara wand. This is to comb through the eyebrows- always up and over- before applying any color product to the brows. The stiff angled liner works in applying powder and cream products to the brows. Sometimes these brushes are available as a duo brush. Here's an example of what it looks like: For adding color to the brows, pencil, powder, or cream products designed for the brows are all great options, it just comes down to preference and how much filling in you need. For example, I use both a pencil and powder to fill in my brows. The pencil is used to stencil the shape of the brow I want and the powder is used to fill in the actual brow. Important tip: use the spoolie after each pencil, powder, or cream product application to blend in the product. This controls how much product you add because with brows, its easy to get heavy handed! Another tip to remember is that you want to stay in the same color family as you hair, but go a shade or two lighter than you hair. The only exception is for those with blond hair- in this case, you wan to go a shade or two darker. So there you have it, a little crash course on the science of eyebrows! Hope this post is helpful in achieving the brows of your dreams!
Sometimes a trip to your nearby drugstore or makeup retail store can be quite overwhelming. You know what you want (or at least you think you do) but then again you're not sure if it's what you need. I understand, I've been there. Rows and rows of colorful displays, each fighting over your attention can bring anyone to say "Forget it! This makeup thing is too hard!" But let me reassure you that with a little know how you'll know what different products are made for and if it's suitable for your makeup needs. In this post, we'll focus on face powders, the different types available, and what their intended purpose is and if it's right for you. 1. Translucent powder: This powder is used for setting any cream of liquid foundation on the face. Since it is translucent, it will not alter the color of your foundation. It is very finely milled in order to provide an even, thin coating on the face. It's name doesn't just refer to it's color, but also the appearance it gives to your skin-translucent- as in it blends seamlessly on your face, avoiding the dreaded "cake face". Here's the one I use (and it holds a great reputation, its been around for more than 50 years!) 2. Powder Foundation: This powder provides extra coverage as a liquid foundation would. These powders are great for those who don't like to wear liquid products on their face but still want a medium to full coverage application. This is also a "2 in 1" for those who have oily skin because the powder provides coverage as well as helping to mattify the skin from excess oil. Here's one that I use and absolutely love: 3. Blotting Powder: Now this one may be new to some and be confusing to others. Blotting powder is meant for touch ups throughout the day for those who have oily skin. The main ingredients are dimethicone and silica. These 2 components work to create a smooth appearance on the face (primers also include dimethicone) as well mattify the shine that oil leaves on the face. This is not meant to be used as an all over face powder to set makeup, but as a touch on top of existing makeup. Here are two examples, one drugstore and one high end: 4. Compact Powder: This is the most versatile powder in the group. These powders come in shade ranges just as foundations do and can be used alone for light coverage, on top of foundation for extra coverage, or as touch up powder throughout the day. Here's two I would recommend: 5. Loose powder: This is the same type of powder as the compact powder just in a loose form. This is applied with a powder brush all over the face. Loose powder comes in translucent and an assortment of shade ranges depending on the brand. Here's one I would recommend: Hope this post was helpful and comes in handy next time you're shopping for a new face powder. Which powders would you recommend? I'd love to know to try them out!
1. Pour a small amount of alcohol into eyeshadow pan: A dropper is useful here since you get more control with the product and avoid pouring the whole bottle in the pan. 3- 5 drops will do, but may depend on size of eyeshadow. 2. Smooth out eyeshadow: Now you want to bring the product together like a paste, smoothing it out with either your finger, a small makeup spatula, or even a quarter wrapped in tissue paper works just as well. Make sure the shadow is packed tightly together to ensure it bonds correctly. 3. Let eyeshadow dry: Once you've smoothed the shadow in place, let it dry for at least 1-2 hours to ensure the alcohol has dried..You can check by running your finger over the product. And voila! Your precious eyeshadow is like new again!
Do I have some news for you! I just found a company that offers a line of brushes that are comparable to the coveted Sigma Brushes that are sought after everyone in the makeup community. They're called Beauty Junkees and can be found on Amazon. All their brushes are priced at $11.97, which is less than any brush that Sigma offers! I've tried their dupes for the Beauty Blender and I can honestly say I was impressed! I'm looking forward to trying out some of their brushes, especially their flat top kabuki, which is their most popular brush. Their products come with high ratings and great customer reviews. And another perk is that they are offered as Amazon Prime products, which means free 2 day shipping! If you are not a Prime member, you should be, it's absolutely worth the yearly cost! I order tons of makeup accessories from them, as well as household and baby items, and it really pays for itself! Here are the links to the brushes:
We've all been there- makeup is done and then the unwanted happens- our mascara smudges, eyeliner is crooked, foundation isn't blended in, etc. Noooo!! I've been there many times, feeling like the only option is to wipe everything off and start all over again! But before you reach for those makeup wipes, here are some easy and useful tips to prevent many of these oops! moments and how to prevent them from happening the next time you're getting ready. 1. Too much foundation: Sometimes we get too heavy handed when applying our foundation and the only way we think to fix it is to remove it and start all over again. If this happens to you, grab a piece of tissue and separate the two layers. Grab one layer of the tissue and dab it on your face. The tissue will absorb the extra oil and foundation on the face without shifting your makeup. Do this again with the other piece of tissue. Repeat this until you are happy with the results. 2. Unblended Foundation: Grab your sponge that you applied your foundation with and gently dab on the area to smooth out existing foundation. Do not add any additional makeup because that will shift your makeup and cause uneven color spots to appear on your face. If you didn't use a sponge to apply foundation, grab a clean one, wet it and squeeze out excess water, and do the same thing. This is why I recommend having beauty sponges in your makeup kit. They come in handy in many situations!! Set with a very light application of setting powder if needed. Here are some suggestions: 3. Mascara or eyeliner smudges on eyelid: The first thing to remember here is to wait! Let the product dry because if you try to wipe it off when it's still wet, you will just create a bigger smudge and it becomes harder to remove. Once the it dries, go in with a q-tip (I recommend using pointed and flat edged beauty Qtips) If needed, apply a small amount of makeup remover on the tip to help with the clean up. Then touch up makeup as needed. 4. Lipstick Feathers on Lips: Oh, the dreaded old lady makeup no-no- when your lipstick goes beyond your lips and gathers around the lines of your lips! One way to avoid this is to use a lipliner to secure your lipstick in place. It creates a barrier for your lip product to stay put. However, even with some lipliners this till happens depending on the formula of the liner and how your lips react to lip products. An extra step that will help to secure your lipstick even further is to apply powder on the outline of your lips and around your mouth, then apply your lipliner and lipstick. 5. Lipstick on teeth: There's nothing more embarrassing than to be caught with something in your teeth, lipstick included! One simple tip is to put you finger in your mouth and pull it out while touching the inner part of your lips, kinda like you're licking frosting off your finger. This will remove the lipstick in the most inner part of your lips that tends to grab onto your teeth. Do this each time you reapply your lip products. Do you have your own quick fix tips that you swear by? I'd love to hear them!
Trying to get the perfect foundation match is probably one of the most hardest things I hear from women-and from personal experience- to accomplish when it comes to makeup. We hear the words "warm", "light", "cool", "beige", etc and it leaves us going, huh? So to clear up the fog on color matching your foundation, here are some terms and their definitions that will help you find your perfect color. 1. Undertones: What this means is the underlying color that you have, or the pigment that comes across on your skin. A person has either a pink or yellow undertone and falls into the warm, cool or neutral color category. Pink: Pink means exactly that, pink. This applies to the very fair skinned up to those of deeper tones who burn easily, bringing out the reddish pink hue pigment in their skin. Such colors in this category have the words "ivory","fair", and "beige" in their color name. One tell tale sign is that the veins on your body will show through in a blue toned hue. Yellow: This undertone is for those who do not burn easily and whose skin turns golden in the sun. A person in this color range will have greenish hued veins. Words such as "golden", "sand", "tan", and "beige" are found in this color selection. Many people in the yellow category can also fall in the "neutral" family of foundations, which means that they have some redness in the face. Pink (R) vs Yellow (L) Undertones Warm: This applies to those with yellow undertones, from medium to olive complexions. Words like "honey", "medium", and "deep" are found in the color selection. Cool: Neutral or pink based undertones fit in the "cool" category. Very fair to women of color with a reddish undertone are in this group. Neutral: This is when you fall right in the middle of the pink and yellow color range. Although I have a yellow undertone, I fall in this category because my shade is usually right after the last pink shade and the first or second yellow shade in any given foundation brand. I don't turn red in the sun, but I do have redness around my nose and chin, which the yellow neutralizes, hence the name "neutral". Common color shades will include "medium" and "neutral" in their names. For example, I wear medium beige in my Cover Girl 3 in 1 Outlast Foundation (see my essential page for more product info). So next time you find yourself staring at the foundation section with that "deer in the headlights" look, remember these useful tips to help you find a color that will help you achieve that perfect color match. One last tip: our faces are not one color, they are multi dimensional. So when in doubt, just grab 2 colors and mix them to create your own custom color!
Here's the latest video on my Youtube channel: Easy Smokey Eye. Enjoy! I just filmed a video tutorial on this easy smokey eye look. Video will be up soon! I thought I'd post some pics with a product list and where each was used. On the eyes I used shadows from the Naked 2 Palette This look is super easy and and takes no time at all. Stay tuned for the video upload!
In yesterday's post, I offered a list of 12 essential brushes to have in your makeup kit that will help you achieve any look that will fit anyone's budget. I shared that you don't have to break the bank to get great brushes in achieving a beautiful makeup application. So here are my recommendations for must have brushes, many doing two jobs in one, with detailed use description for each one. These are the brushes I use in my makeup videos. This might be the one brush that has changed it all for me! It is extremely soft, superbly crafted, has dense bristles that don't lose its shape, and is multi purpose. As its description states, its meant to be used with powders. You can use it to apply powder all over the face or to dust off any extra that you may have put on. What I love it for is to give a good "buffing" to my face as a final touch. I use this after applying powder, bronzer, blush and highlighter to continually blend in every product, creating a seamless canvas on my face. This brush is so soft you'll get addicted to using it! I use this brush as both a blush brush and for its intended stippling purpose. This brush is a dual fiber brush, meaning it is made with two types of bristles, each in a different length. This is to create a blurred or airbrushed effect. When used with blush, it lightly applies the product, making it easier to diffuse and build on the color, creating a natural flush on the face. As a stippling brush, it can be used to buff in cream products, such as foundation, cream blush and highlighter. Crown Brush C441 Pro Blending Crease This is a must have in achieving a beautifully, blended eye. It's soft bristles are easy on the eye lids and its dense bristles help in grabbing the product. In a back and forth, windshield wiper motion, place this brush in the crease to blend in eyeshadows. E.l.f. Essential Eyeshadow Brush This brush is great for packing on color on the eyelid. It's dense bristles make it great for precise application. This brush packs a punch because its like getting 2 brushes in one, and with its low price, you could afford to get more than one! I love to use it as a fluffy eye blending brush when applying a neutral transition color on my eyelid after my eye primer. You could also use this with powder to set any under eye or spot concealer on the face. It gives a precise application when working with small areas. This brush also performs as two brushes- a foundation or powder buffing brush and as a contour brush, which is my preferred use for it. It's dense bristles are great for precise application and its softness allows for ease of use and application of product. Crown Brush C413 Brow Duo Brows are so important because they give structure and character to our faces. A spoolie, or eyebrow brush, is a great tool for grooming the eyebrows. Remember to brush in the direction of the hair (up and over) and not down. Some spoolies come with a stiff taklon bristle end like the one shown for applying powder or gel color to the brows. Filling in any sparse areas with these types of products will make a big difference. Beauty Sponges Although this may be a personal preference, I really prefer to use beauty sponges instead of brushes to apply foundation. Their shape and texture allows for a soft, airbrush application. However, not all sponges are alike. Depending on the material and quality of product, application results will vary. My top 3 picks are: Real Techniques Miracle Complexion Sponge, Graftobian GalmourGrip, and any generic brand of latex free beauty wedges. The trick is to soak each one completely in water, squeeze out the access, then use a bouncing motion when applying foundation. This is what creates that airbrush like look on the face. You can find a more detailed description of my favorite one on my essentials page. Crown Brush Metal Eyelash Definer Not only do well groomed brows make a difference in the face, but well separated lashes do too. This comb will help you avoid falling culprit of the "spider lashes"- thick, clumped together lashes caused by too much mascara and not enough separating. This is often a tool I see missing, if not absolutely clueless about, in a makeup kit. Crown Brush IB113 Taklon Angle Liner This brush can be used with gel, pencil, and even eyeshadow to create a defined line on the eyelid. With gel liner, you dip the brush in the product and apply. With pencil liner, you can use the brush to buff out the pencil to create a softer line. When applying eyeshadow with this brush, it creates a soft and subtle line on the lid for those days you want to go lighter on the eye. Quick tip: to darken and hold any pencil or gel liner in place, apply a matte shadow in the same color as eyeliner and your liner will stay in place all day- a great way to make any eyeliner waterproof! My hopes for this post was to show how it's possible to own great brushes at great prices to get the most out of your makeup. Although this list may be a bit long, each brush is very beneficial in an everyday makeup routine and will quickly become must haves you can't live without!
Makeup is not only about the product itself, but the application process, the tools you are using and the techniques that go with it. With every masterpiece, there was a person and materials behind it. Even if the artist had the best materials available, but did not have the accurate tools needed to perform the job, the artist would not be capable of creating his or her masterpiece. This is the way it goes in the makeup world- you could have the best, most expensive "materials" (makeup) but if you don't have the right tools to apply them (brushes, sponges, etc) then all the prestige of those materials goes to waste. I've done many comparisons between high end and drugstore makeup and what distinguishes them is the way the product is applied. And even then you don't need to spend tons of money on brushes. Here are my top picks of must have brushes in your tool kit, all available for under $10. First things first- don't get stuck on name brands!!: The complaint I hear the most from women is that they feel discouraged because they feel pressured to buy well known name brand brushes in order to get a decent makeup application. This is not true! This is why I write these posts because I want to remove these common myths of makeup! Let's all say it together, "Just because it's name brand doesn't mean it's the best!!" There are many companies that make great brushes with excellent craftsmanship, durability and incredible texture at affordable prices. Some tried and true and trusted brands I highly recommend are Real Techniques, E.L.F. Studio Line brushes, and Crown Brushes, with price ranges from $3-15 a piece. Not to say that these more expensive brushes are not good, because they are, I'm just saying that there are many alternatives and even dupes for high end brushes that can be found at a much more affordable price. Top essential brushes for every tool kit: 1. powder brush 2. blush brush 3. eye blending brush 4. flat eyeshadow brush 5. fluffy eye blending brush 6. small face tapered brush 7. spoolie and angled bristle brush duo for eyebrows 8. beauty sponges 9. stiff angled eyeliner brush 10. tapered eye blending brush 11. eyelash comb 12. stippling brush This may seem a bit overwhelming, but trust me, 12 brushes is nothing compared to what many makeup artist use on a daily basis, me included! These brushes can help you achieve any look and provide you with the adequate tools to achieve a beautiful makeup application. Stay tuned for the next post where I personally share what specific brush I use and how to use it to create a professional makeup application. Do you have any brushes you'd like to add to the list? Let me know!
As a mom of two young children, baby wipes are an essential part of my home- there's a case in each bathroom, in every bedroom, boxes of them stacked in the downstairs closet- you name it, they're there! Not only are they great for poop (hehe!) but for food messes, snot attacks when your toddler politely sneezes in your face, and for smearing off whatever that stain is on your shirt (how'd that get there?) But for years before my children were born, I would pick up a large box of them at my nearby Costco. "But you don't have kids!?" friends would tell me. Yes, but what I was using them for was one of my top beauty secrets that I've shared with many through the years- they are great at removing makeup!! I've tried many brands but I constantly returned to the Costco Kirkland brand wipes for their unscented, non-sticky , no residue amazingness! They are super durable, unlike other brands that with one wipe tear in half or disintegrate before your eyes! I simply apply my eye makeup remover to them, start with my eye makeup, then use the rest around the face. You can also apply cold cream to your face and use the moisture of the baby wipe to remove face makeup. So the next time you're at the store buying makeup remover wipes, walk to the baby section and give baby wipes a try. Trust me, you'll find many more uses for them than just removing makeup! And they're also great as face wash cloths- just lightly wet the wipes, apply a pump of your face wash to the wipe, and scrub away! Do you have an unlikely secret beauty product? I"d love to hear them!
When shopping for groceries, what is the one thing we always do? We look for the product with the longest expiration date to make it last, or in the case we forget its in the pantry or fridge (which is me, all the time!) we have a chance of using it when we do finally get around to it. The funny thing is that when it comes to makeup or personal care products, we don't apply the same thinking. All products must break down and lose their active properties which promoted us to buy them in the first place. Just like we wouldn't eat something that is a year, month, or even a week old, we should practice this thinking with makeup. Without proper care and cleanliness, that makeup you put on your face day in and day out can be harboring bacteria and may be the answer to those unexpected breakouts or other skin problems. 1. Mascara: This one might be familiar to you- the 3 month rule is pretty much common knowledge, but if you're one of the few who didn't know, well now you do! Once a mascara is open, it takes about 3 months for the formula to start breaking down and begin to dry up. This is due to air being pumped into the container when the wand is being pushed in and out. A great tip to extend the length of your mascara is to not pump the wand to extract the product, but to wiggle the wand around the inside of the tube to get the mascara out. Another reason to throw it out is if it becomes contaminated or "dirty" if your eye comes into contact with something in the air that causes irritation, or the dreaded "P" word happens- pink eye! If this occurs and you've been continually using the same mascara after contact, throw it out! 2. Foundation, Concealer: These products can vary in their 12-18 month expiration dates because of formulations and care of the product. I have many foundations that I rotate in my weekly use depending on weather conditions, finish, and color, so I may have the same foundations in use for over the 12 month mark and are still useable. What can alter this is how the foundation is packaged. I find that when they come in pump form, less air and chance of bacteria entering the bottle is likely to occur, extending the life of the foundation. When it comes in a compact cream form that when opened to use is exposed, theres more chance of bacteria build up or of drying out. What's important when using compact form foundations is to use a clean sponge with each application, or with concealer, using clean fingers and brushes!! Many of them come with their own sponge, which is great, but I recommend washing the sponge every 2-3 uses, especially if you are experiencing a change of skin or breakouts, if not you're just spreading harmful irritants on your skin with each application. 3. Eyeliners: Just like with very product, cleanliness is key. We all know we shouldn't share makeup, but if you do, or in the case of makeup artists who work on multiple clients, make sure you sanitize after each use. One product that is great for this is from Beauty So Clean. They sell sanitizing mists and wipes for product cleaning. As with mascara, if you get an irritation or infection in the eye, throw out any eyeliner product you have used to prevent further infection. 4. Lip Products: This one can be a bit tricky, especially for those who love lip products and can't bear with parting with their favorite lipstick (like me!). The innocent act of freshening up our lips after eating or drinking can cause bacteria and food particles to live inside a lipgloss tube or on the surface of a lipstick, quickly turning our beloved lip glosses into bacteria breeding grounds. To take extra precaution, make sure your lips are clean of any foreign objects such a food residue and clean the top of the lipstick or the tip of the lipgloss applicator before and after every use. 5. Powder products (face powder, blush, eyeshadows, etc.): This is the one product I always thought couldn't go bad, but its important to remember that the ingredients in powder products will eventually break down and contamination with outside bacteria is still possible, especially when using the applicators that come with many of these products. Eyeshadows kinda give a tell tale sign that they may not be at its fullest potential by change of texture and color, but this may not always happen. Discernment is key in this area. If something looks weird, or if the texture has changed, don't hesitate. As the saying goes- when in doubt, throw it out! Hope this post was helpful! Cleanliness is so important in makeup application and can be the answer to skin irritation and infection. So, what products do you need to get rid? Just think, getting rid of products just means you have to buy new ones, sounds good to me!
First video is now live and in color! My easy, everyday makeup look, check it out! I found this tag going around YouTube and always thought I'd be fun to do. It's a lighthearted approach to the famous "7 deadly sins"- greed, wrath, gluttony, sloth, pride, lust, and envy. So let's get started! 1. Greed- What is the most expensive beauty item you own?: Well, this one wasn't too hard for me since 99% of my makeup is drugstore! However I have been known to splurge every once in awhile, so my most expensive beauty item would be my Naked 2 palette. It retails for $52 and was a birthday gift to myself when I turned the big 3-0. 2. Wrath- What products do you have a love/hate relationship with? For this one I chose cream bronzer/contour products. It's either I'm having a good day with the product and it comes out looking great, or my face just looks like a muddy mess! 3. Gluttony- What products do you most own in abundance? Or what product is your most "delicious"? This question is so fun and weird at the same time because when we hear the word gluttony we automatically think of food. However I see the tie between overindulgence and makeup because we love to consume products to add to our collection. So for my overindulgent product, it would have to be lipsticks and neutral shadows. The thing with lipsticks is that I tend to love one color and then buy that version in 5 different brands. Like how many shades of the same pink do you need? Well for me, at least 7! The neutral shadows seem to just creep into my makeup collection, increasing in number with every Ulta and Target trip I make. I must have about 4 large palettes of the same colors but I just can't seem to get enough of them! As for my most "delicious" product, I would have to give that title to my MAC Candy Yum-Yum lipstick. This bright, neon pink lipstick just makes me happy when I see it. Granted I don't wear it very much, but when it came out I had to have it! 4. Sloth-What product do you neglect the most out of laziness? This one would have to be face masks. There are months where I have been consistent in making my DIY masks and loving the results I get, but most of the time life's busyness gets in the way- which in my case is in the form of a 4 year old and a 6 month old- and going the extra step in pampering my skin goes to the wayside. Just thinking about it makes me feel lazy.... 5. Pride- What beauty product gives you the most confidence? Geez, this was a hard one! I'm torn between two, so since this is my post, I'll include both! I would have to say my brow products and mascara give me the most confidence. I think my face looks dramatically different once I put my eyebrows on- eyebrows are everything to the face, giving it shape and character. The second one would be mascara because just like eyebrows, I don't have very much eyelashes. Mascara really opens up the eyes and makes you look more awake. 6. Lust- What beauty products do you badly want to own? Yeah, well, this isn't a question you ask a person who loves makeup as much as I do, because then I would say everything! But if I had to choose, I would say I'd really like to own all of the Urban Decay Naked products. especially the Naked 1 and Naked 3 palettes. I love the formulation of the Urban Decay eyeshadows and their neutral shades are great! I guess this would feed my gluttony with the neutral eyeshadows, wouldn't it?! 7. Envy-What items that you have seen owned by others would you want to have? This one was way too easy for me! I have a friend that is a MAC Pro makeup artist and her collection of brushes and access to products is amazing, so I would love to have all her goodies in my collection! "Lipsticks and blushes and brushes, oh my..." Hope you found this post as much fun to read as it was for me to write! What are your 7 makeup deadly sins?
My previous post Five Things You May Be Doing Wrong was such a hit that I decided to do a part two, this time concentrating on makeup faux pas. A Faux Pas is defined as "a socially awkward or tactless act, especially one that violates accepted social norms, standard customs, or rules of etiquette" (Wikipedia). I've always supported a free spirited, creative perspective on makeup, however makeup is supposed to work in our favor to enhance the beauty that already is there, not to make people stop and stare and wonder "why is she doing that to herself?!" Here are 5 more makeup "no-no's" to add to the list: 1. Un-naturally drawn eyebrows: In the previous post, I pointed out how too dark or overly drawn eyebrows can age you and close in the face. This time I'm talking about eyebrows that are drawn in a way that gives a permanent surprised look (you know what I'm talking about, we've seen them before!) The natural brow hair is completely removed and then some kind of geometric shape is drawn in its place. Maybe its a cultural thing, I don't know, but it isn't a social norm, and quite honestly, cause others to feel "socially awkward". 2. Cleopatra Eyeliner: Now this too could be a cultural thing, but I've lately seen it go to the extreme of ridiculous. I love a great cat eye with a crisp flick at the end, but when the flick keeps going, and going, and going, where it stops short of touching the hairline, even Cleopatra herself would turn in her grave! Keep it short and simple ladies! (unless its Halloween, then carry on). 3. Overdrawn Lips: Now I know this one might be stepping on some toes, but I'm still including it in the list. I understand that outlining the lips SLIGHTLY over the natural lip can create the illusion of plumper lips-I have used this technique when I've done makeup on others- but thats not what I'm talking about. I'm talking about when the lips are overdrawn so much that the lipliner is coming into contact with the side of the cheeks and the top of the chin! And why is it that a dark liner is used with a lighter color on the inside? Is that supposed to help the lips look bigger? Because it doesn't- it just makes them look silly, just plain silly. 4. Spider Lashes: This one just boggles my mind because it can be remedied with a 2 simple acts- replace your mascara and stop at 2 coats! The more mascara you place on your eyelashes does not mean more voluminous or longer lashes- it just means that the product is going to start clumping together that you'll look like you're walking around with two furry insects on your eyes! Use a lash comb to separate the eyelashes between coats. If needed, 3 coats can be used but remember to work fast and separate the lashes. 5. Unblended Eyeshadow: Oh, dear, this one is a personal pet peeve of mine. I mean, why would they sell blending brushes if they weren't needed for eyeshadow, right? This is when you see all the colors a person used on their eyelids in order, stacked one on top of the other, like the colors on a rainbow. When I see this I get the sudden urge to take out a brush from my makeup bag and blend it myself! I am continually surprised to see this being committed- I mean, is there someone out there promoting this as okay?! Insert face palm here ---> Do you have any makeup faux pas to add to the list? Or have you been guilty of committing some of these ( I know I have!) I'd love to hear them!
|
Author
When I'm not spending way too much time getting ready or drooling over the newest beauty product, I'm a stay at home mom of a rambunctious 4 year old boy, a sweet baby girl we lovingly call "sissy", and a wife to my high school sweetheart. Archives
August 2014
Categories
All
|