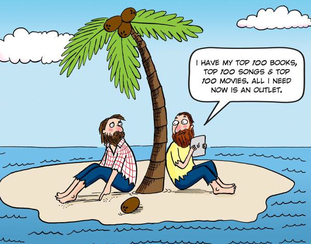
Most of us have seen movies where people have gotten stranded on an island and how much they wished they had just a couple of their belongings from back home, like in Castaway with Tom Hanks, or the popular t.v show Lost. Well sometimes I think, if I knew I was going to be stranded somewhere (hopefully not on a deserted island or somewhere indefinitely, you know what I mean!) and I could only have 5 beauty products, what would they be? What products are truly essential in my routine that I feel are must haves in case of an unlikely event occurring? I really had to rack my brain for this one, so here's what I came up with: 1. Sunscreen: For obvious reasons, especially for the sake of the title of this post! In most emergency situations, you're likely to be exposed to the elements, most likely the sun. With sunscreen , I at least have some protection from the harmful effects of the suns rays. 2. Chapstick: Just like the sunscreen, I want to be protected from the outside and having chapped lips is one of the worst feelings ever! Add in the fact that there might not be much water around, a lip moisturizer will definitely be a must! 3. My Anti-Frizz Hair Serum: Now although this isn't technically a "beauty" item, it is beauty related. I naturally have frizzy curly hair so add in moisture, humidity, and heat, that's a recipe fro disaster! There's nothing more uncomfortable than a crazy mane of hair, especially when you look like Mufasa from the Lion King! 
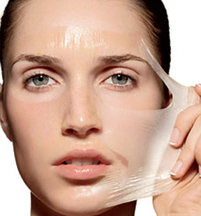
4. Face Moisturizer: Just like chapped lips, dry skin is the worst feeling. Plus, you can double its use by using it as a body lotion if needed. 
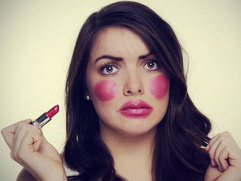
5. Mascara: Looking down at the list, it appears as if this item is the only true makeup listed. If I were to be stranded somewhere, the comfort of my skin and hair would be more important than having makeup on. But mascara is one of those products that can bring an added "oomph" to our face. Darkening our lashes even with a bare face can make you look more awake. What would you bring along? Would you pick comfort or glam? It's always fun to hear what others have to say!
0 Comments
Egg whites, honey, yogurt, olive oil- ingredients found in almost every kitchen that many would never think of combining as a recipe for beautiful skin. It sounds more like an ingredient list for some sort of cake instead of a face mask. I first stumbled upon the idea of using face masks when I found a story about one of the most famous first ladies in our history- Martha Washington. Apparently, she maintained a youthful glow and great skin as she aged by using her very own face mask recipe of egg whites, honey, and apple cider vinegar. Intrigued, I tried it and instantly saw a difference in the brightness and firmness in my skin. Many foods contain powerful enzymes and proteins that can dramatically turn back the clock on our faces. Here are some "super foods" that you may want to try: 1. Egg Whites: This super food is great for tightening the skin. Those with oily skin will love egg whites as they help shrink large pores which will reduce the amount of sebum (oil) the face produces. Egg whites contain an enzyme that works against bacteria gathering in the pores, causing break outs. The potassium found in eggs provide hydration and its magnesium content helps for a radiant glow. Disclaimer: there is some controversy over using egg products on our faces because of possible contamination. As always, consider your type of skin sensitivity and tolerance to different ingredients. If used, I would recommend using organic eggs to endure the best possible product outcome. 2. Lemon: Not only does it make good lemonade, the acid in lemons provides a bounty of benefits on the skin. It works in fighting off acne by killing the cells that encourage the growth of bacteria in our pores. Just as lemon is used by many as a hair lightener in the summer, it also has the same effect on the skin, helping with discoloration and age spots as we get older. 3. Avocado: Heres another great one, just hold the chips! This super food is packed with essential fatty acids which hydrates and moisturizes the skin, allowing our skin to glow. 4. Yogurt: As the live cultures in yogurt work to fend off bacteria to grow inside of it, it also works for bacteria on the skin. Just like lemon, yogurt is a powerful ingredient to use to fight acne causing bacteria, as well as providing hydration to dry skin. So next time you're snacking on some yogurt, save a spoonful for your face! 5. Honey: Not only is this sweet to eat, but it has sweet properties for your skin! Honey is considered an anti-irritant, which means its a great choice for sensitive skin. Honey is found in many natural baby products because the skin on a baby is at its most sensitive state. The best form to use honey is raw and unheated. When kept in its natural state, it retains its antibacterial properties and the antioxidants work at their fullest potential in promoting hydration, softness, and elasticity in the skin. Here are some quick recipes for specific skin problems: Lift & Tighten: 2 Tbsp plain yogurt with 1 Tbsp lemon juice- leave on skin for 20-30 minutes then rinse. For Dry Skin: 2 Tbsp Honey with 1 Tbsp apple cider vinegar- leave on skin for 20 minutes then rinse with warm water. So let's get cooking! Would you try any of these natural remedies? Or do you have your own tried and true DIY mask? Let me know, I'd love to hear from you!
Part of the journey in learning how to wear makeup is knowing what a product is intended to do and knowing how much is too much. Makeup is meant to be fun and creative, experimenting with colors and techniques. But there so many makeup no-no's that can actually work against us instead of in our favor. The one thing you don't want your makeup to do is to make you look older- not like the cool, mature older we all wanted to be when we were 16-but OLD and not flattering. Here are the most common mistakes that can drastically age your face- and yes, I've been guilty of many of these! 1. Too much blush- Blush is supposed to bring out the natural flush we have in our face that gives us a healthy glow. But when its placed on the front of the cheeks in a bright pink color, you either lean on the side of scary mannequin doll or resemble one of the ladies from the nearby senior assisted living facility. It's just not pretty! Be sure to choose a color not too vibrant which will look too fake, no matter how much blending you do, and place the product near the back of the cheekbones, making your cheekbones look higher and your face slimmer. 2. Dark eyeshadow and dark lipstick- Ladies, unless were going to a Halloween party as Elvira, this is just a big no! I often see this in the younger crowd, girls that think this will make them look older to attract attention from guys. Well, ladies let me tell you- you will get attention, but not the good kind! Both a heavy eye and a dark lip close in the face, causing you to look tired and overdone. If you want to go darker and heavier in the eye, then balance your look with a nude lip or lip gloss to keep the focus on the eyes. Or if a bold lip is what you want, then stick to neutral colors for your eyeshadow. 3. Heavily Lined Eyes- I like to call this one the skunk or the "I look like I just got out of a fight" look. A thick line on the top eyelid and heavy drawn liner inside the eye on the waterline will make your eyes look smaller and your face look tired. Most of the time I see this done in a way that looks like a black circle was drawn around the eye, making the eyes look like black targets. If you want to do the dark eyeliner on both the top and bottom eye, keep the top liner thinner and buff out, or smoke out, the bottom liner with some dark eyeshadow. For an even softer look, try using brown instead of black. 4. Dark Outlined Lips- This one hits home because I'm guilty of doing this in high school. If you're gonna outline your lips in a dark color, make sure your lip color matches the color of the lip liner. Not only is this aging, but it's borderline clown makeup. 5. Heavily Drawn or Overly Tweezed Eyebrows- I'm one who wasn't blessed with a full and shapely set of brows, so brow products have become one of my must have products because without them, well, I just wouldn't have much eyebrows! If the eyes are said to be the windows to the soul, then the eyebrows are the window frames, and if those frames are not looking right, nobody will be looking at your pretty eyes because they'll be staring at your eyebrows!! Brows that are too dark for your skin tone will be unflattering and if drawn too thick, you'll end up looking like Oscar the Grouch. Work with your natural shape and pick a color that is actually a shade lighter than your hair color, or if you have blond hair, pick an eyebrow color a shade darker than your hair. Our brows tend to thin out as we age so over tweezing them will only sped up the aging process! Work with your natural brow shape and think in terms of grooming your brows, not giving them a full on haircut. Keep an eye out for a future post on tips and tricks on how to achieve a young, fresh look, no matter what your age is. As always , leave your comments, questions, and ideas in the comment section, I'd love to hear from you!
"Okay, I admit, I shouldn't have done it, but it just called out to me!!" Oh, how I've said this after picking up yet another lipstick that I don't really need but picked up anyways. I mean, I'm eventually gonna use it, so it's not like I'm hoarding, right?! There are some items in my makeup collection that I enjoy so much that I feel the need to have a back up (and maybe a back up for that one!) because well, you never know when you might need it. Here are some of the items I keep in multiples in my vanity, my makeup box, my car, my daughter's diaper bag..... 1. Lip moisturizer: This is the one product I am never without! After having my daughter, my lips now have the tendency to get dry all the time and I can't stand the feeling of dry, parched lips! I'll just casually pick one up each time I go to Target or Ulta even though I really don't need one, well, not necessarily (here's my favorite). But hey, ask my husband how many times I've come to his rescue with chapstick? You're welcome honey :) 2. Eyebrow pencils: This one totally makes sense to me, especially since I'm not blessed with a full set of eyebrows, just some sparse hairs that seem to be connected, hanging on for dear life! (But thats another post). I'm always on the lookout for the latest, greatest eyebrow pencil that will make my brows look their best, so naturally I have to test out more than one right? Right. So I keep one with me pretty much wherever I go. Hey, my eyebrows could be wiped off in the middle of a hot day, may need a touch up while I'm on a date with my hubby, or by a sticky infant's hand who likes to touch my face whenever given the opportunity- you have to be prepared for all possible scenarios! 3. Lipsticks: Okay this one I admit I may slightly, possibly, kind of have an obsession with. Lipsticks are my favorite makeup product and when I see a pretty color staring back at me, I feel like I'm staring into the eyes of a poor puppy who needs a home and I feel compelled to take it with me. At any given time, I have at least 6 lipsticks in my makeup bag, not counting the ones in my everyday rotation in my makeup box or in my vanity. Lipsticks are to me as baseball cards are to a collector-we see the value of each one and want to build our collection (however my used lipsticks won't ever be worth a couple of thousand dollars, though I have spent a good amount...) What are your favorite items to have on hand? I'd love to hear your feedback!
Great skin isn't something you get overnight- granted, some women are born with naturally clear, smooth skin, but the majority have to work at it. Products such as wrinkle cream, hydrating lotion, and serums are constantly advertised promising fountain of youth results. Theses products definitely have their place and purpose (hey, I'm using a skin care system with creams and serums- your thirties creep up on you and you're constanlty reaching for more eye cream!) But all these things are just scratching the surface- we need to realize that what we put inside our bodies is what really makes the difference. To put it plainly, what goes in, must come out. Eat Your Fruits & Veggies Remember how our parents would always say "eat your vegetables, they will help you grow big and strong"? Well, theres a reason we should have listened to them. Good food works with the body's natural defense in getting rid of toxins and taking in the good stuff that creates good skin and overall health. Now don't get me wrong, I'm not here telling you to go on a diet, but from personal experience I have seen the benefits of incorporating healthier food in your diet. I began juicing about 2 years ago as a way to balance out my body and lose some weight in the process and guess what happened- my skin was the best it ever was! The antioxidants in the fruits & veggies I was drinking were allowing my skin to be rid of all the toxins it had built up over the years. Since then, I still incorporate juicing as part of my everyday diet. Drink Water- and Lots of it!! The human body is made up of almost 75% water- so naturally the body needs lots of water to stay in balance. Water allows our organs to function at its best and works as a filtration system, allowing our bodies to release the bad stuff and retain the good stuff. You can hydrate you skin with a great moisturizer, but that only goes skin deep. If your body is dehydrated, thats as far as your moisturizer will go. So drink up! Don't Worry, Be Happy! Stress and depression is one of the leading causes for many ailments and diseases- it causes our bodies to become unbalanced, creating friction with the good stuff in our bodies and allowing the bad stuff to take over. Choosing to be happy is something that is easier said then done-especially when you look at the mirror and not like what you see. As a mother and a woman who has dealt with body issues all my life, I have struggled to find a balance between caring for myself and becoming obsessed with wanting to look like an image in a magazine or in a movie. As a Christian, I believe that I am fearfully and wonderfully made (Psalms 139:14) in the image of God. He has created me exactly how He wants me to be and I am to take care of the body He has given me- physically, mentally, and spiritually- through the lenses of His Word. My body will change, my face will age, but my soul, what's really deep inside, matters and will live forever. So yeah, my body has changed, but I have gained 2 beautiful children in the process, and yeah, I have way more wrinkles around my eyes than I did last year, but that just means that I've had many laughs with my loved ones and that causes me to smile and praise my God for all these blessings. When it comes down to it, this is why I decided to start this website- to bring my love for makeup to others because of the passion and talents God has given me, giving Him all the glory and hopefully pointing others to Him. Charm is deceitful, and beauty is vain, but a woman who fears the Lord is to be praised (Proverbs 31:30) I'd love to hear your feedback! your comments, questions, and any ideas for future posts are greatly appreciated!
I 'm starting a series of posts of the most common application questions I have received through the years called Back to Basics 101. I think what gets lost in the world of beauty websites and video tutorials is the simple step by step guide to everyday makeup application- foundation, blush, lipstick, etc. In this post, I will be focusing on bronzer. Bronzer is one of the most misunderstood and poorly used products, and also one of the most overlooked. When done correctly, adding warmth to the face can create a healthy glow and dimension to our faces when achieving a great makeup look. I often get asked "how do you look so naturally tanned and get that defined look?" Well, its bronzer. To be honest, I've also committed so many of the same mistakes in learning the proper way to apply bronzer and to contour that I've been guilty of the "dirty face"- what happens when you wear too much bronzer and you look like you've been pulled through a pile of dirt! This post will offer some tips on the proper way to apply bronzer in order to achieved a contoured look that will raise your makeup application skills to the next level. For reference, I've included the picture seen on the left to help in each step and links to recommended products. 1. Matte is where it's at: When choosing a bronzer for contouring, always look for a matte bronzer without any glitter or shimmer in it. The purpose of the bronzer is to define and "pull back" those features on the face you want to slim down or make smaller (the cheekbones, frame of face, nose, etc). Any shimmer will only bring attention to the face and will have the opposite effect that a bronzer is supposed to do. 2. Brown is the new orange: For the longest time, bronzing powders and creams have been made with an orange tone, leaving your skin with an unnatural color, making you look like a stand in role as an oompa loompa in Willy Wonka's Chocolate Factory! When the sun warms up our skin, it creates a reddish undertone. What you want to find is a bronzer that has this same undertone to get the most natural look possible. Check out my essentials page to find the bronzer I use and love. 3. Avoid a heavy hand: To ensure a natural, flawless application, take your time to build up the product. Work one area at a time to avoid getting bronzer all over your face, which will defeat the purpose of contouring. Adding product in small amounts allows you to have more control over product placement and allows you to have a cushion for mistakes- its always easier to add more product than to remove it. 4. Blend, blend, blend- then blend some more: You want the bronzer to melt into your existing foundation or powder thats already on your face to create a seamless look. Blending will create an even, airbrushed look, creating the illusion of that great tan you would get after a vacation on a tropical island (which I'm still waiting for, but that's a different story). 5. Get the right tools for the job: For contouring , an angled or a small densely packed brush works great. I love using the Real Techniques Expert Face Brush for this area (see additional recommendations on my essentials page) A larger brush can be used if you're looking to just warm up your skin instead of defining through contouring, such as kabuki brush , which is a short bristle, tightly dense brush. I hope you find these tips useful in helping you achieve a beautiful bronzed, sun kissed look. Please leave your thoughts, questions, or comments on what products you'd like to see featured in this Back to Basic Series. Videos covering these topics will be coming soon, so look out for links to my youtube channel in future posts.
Costco- the place where you find great deals on home goods and obnoxiously big packages of toilet paper, all in one! And it seems that Costco is adding high end beauty products to their inventory. For many years, their in house brand, Kirkland Signature, has released a yearly cosmetic brush set every year around the holidays season (which I owe two sets of and count them as some of my most used brushes) However in the past 2 years or so, I've noticed some prestigous brands from beauty, hair care, and skin care collaborating with Costco and selling their items in store. Brands such as Big Sexy Hair, Tigi, Paul Mitchell, Shisheido, Smashbox, just to name a few. Most I've over looked because the price tag was still a little too steep for me, but last week I found a product that literally knocked my socks off! I picked up the Lancome Aquatique Waterproof Eyehsadow Base in Nude. And the price tag? $12.99!! What?! The famous MAC paint pots retail for double that and Lancome is a much more prestigous brand than MAC. I was curious to find out if the eye base is currently being sold elsewhere, and yup, I found it on Sephora.com. Here's what the product looks like: This item regularly retails for $26- double the price that Costco offered it for. Wow! However, with Costco, not every store carries the same items, but its a worth a try to call your local Costco and ask if they currently have it in stock. I loved it so much that I actually went back and purchased another one yesterday! I live in the southern California area and found it at the City of Industry location. Run, don't walk, if you can get your hands on it!! Wanted to share some great sales going on right now! Check out BH Cosmetics for their current specials on palette bundles, up to 70% off!! Awesome deals that I may have to jump on myself! Hurry, these offers are good until 4/7. To stay up to date with all promotions, events, and new products get on their mailing list today! Hautelook.com will be promoting NYX products for 40% off!! With their already great prices these items will be a steal! Visit their site, become a member, and start shopping! CVS.com All beauty, hair, and skin care products are 25% off on all online orders now through April 12. Rite Aid is offering buy one get one 50% one many of their makeup lines, including Revlon and Maybelline. An exciting deal is for Physicians Formula, where all face powders, foundations, and primers are buy one get one free!! I really enjoy their mineral powder. Plus, you can print out a coupon for an additional 20% off your total bill now through April 16th. Check your local weekly ad for special offers in your area. I often get asked "what are your top most inexpensive makeup products?" Oh, how I love that question! I love it because I have so many to choose from and there are so many products I've found over the years that are true diamonds in the rough, yet are overlooked because a low price tag brings a sense of "cheap". So in this post I want to dismantle the myth that low price doesn't always mean low quality. 1. These brushes pack a punch when it comes to drugstore brushes. Their all black appearance reflects that of their more expensive competitors, giving them a sophisticated, more professional look. Their soft bristles feel comfortable on the face and the E.l.f line offers a variety to choose from, from small detail brushes for eyes, to large powder brushes for all over application. My favorites are found within their studio collection (pictured on the left). The powder brush is excellent at buffing in powder and liquid foundation The small stippling brush is a great brush to use when applying cream products, such as blush, highlighter, and bronzer. 2. Wet n Wild Eyeshadows: These eyeshadows are packed with pigmentation and long wearing color. They've been my faves for years and continue to be a product I continually return to in my collection. 3. I have tried so many bronzers at the drugstore but was always disappointed at the color pigmentation, the orange tint that they would leave on the skin, or at the amount of shimmer they had. I made it my mission to find a good matte bronzer at a drugstore price and wow, did I ever! This bronzer has great color pay off, silky in texture and easy to apply. 4. This sponge creates a great finish on the skin when applying foundation, almost an airbrush look. It's also great at applying loose powder on the face. The magic of this sponge is because of the texture it gives when wet. Just submerge in water, completely soaking the sponge, then squeeze excess water to leave the sponge moist and bouncy. Great alternative to the high end Beauty Blender which retails for $20 a sponge! 5. I've compared this concealer in wearing power and quality to my high end favorite MAC's Pro Longwear Concealer (see essentials page) This concealer is creamy, easy to blend, and provides full opaque coverage for concealing blemishes, redness, dark circles, and any other problem area where coverage is needed. Apart from its concealing power, because the product is so pigmented, it can be used as a foundation and as contour and highlight creams because of its extensive color selection. More ways to use means more bang for you buck! What other Top 5 lists would you like to see? Comment and connect with me!
We all know the story about the 3 little pigs and the big bad wolf- one pig built his house with sticks and the wolf blew it away; another built his home out of straw and once again, the wolf destroyed it; but the last pig was smart and built his house with a strong foundation of bricks and the big bad wolf couldn't destroy it This is very much the same with the foundation we wear on our faces- if not used with the right ingredients and the proper application, a "big bad wolf" is going to come and ruin it. Here are some quick tips on getting a flawless finish with your foundation: 1. Wash & Exfoliate your face: just as a painter sands away old paint before applying a new coat, so we also need to keep our faces clean and smooth. Pick a face wash that works with your skin type (dry, oily, or combination) and invest in a good face exfoliator. These little hand held machines are powered to give you a deeper scrub that will lift any dirt and impurities out of your pores, leaving a clean canvas for your foundation. Here's the one I use and recommend- Mary Kay Skinvigorate Cleansing Brush. But if you don't want to spend the extra bucks on a brush, then any exfoliating product can work, such as St. Ives Invigorating Apricot Scrub. 2. Use a primer: Back to the example of the painter- after he sands away the old coat of paint, he applies a primer so the new paint can adhere to the object he's painting. A face primer creates a smooth barrier between your face and the foundation, filling in lines and pores to create a flawless finish. This is the primer I recommend on my essential page. 3. Pick a foundation created for you skin type: Not all faces are created alike, and so is the same with foundation. Pick foundations that have ingredients that will work with your skin type. For example, oily skin types will want to look for the words "matte" and "oil control" on the packaging, which help to control shine and excess oil. For dry skin types, words like "hydrating"and "dewy" will tell you that the foundation works to replenish the skin. 4. Set it and forget it: Now that you've done all this work in creating a flawless canvas on your face, you must lock it all in to ensure lasting results. A translucent powder is great to set foundation because its lightweight and does not alter the color of the foundation. However, you can also set it with any face powder, or for even more full coverage, with a powder foundation (check out my post on my favorite powder foundation). With these simple tips you're on your way to a flawless canvas! Your inner beauty will shine through and no "big bad wolf" will take that beauty away! Was this post helpful? Your feedback is greatly appreciated and any comments, questions and post ideas help me to reach you better!
In the previous product spotlight, I posted about how concealer is often overlooked as a valuable product that can benefit your makeup routine. The word "concealer" can often brings with it a sense of having horrible skin that needs to be covered up or a product that only older women are in need of. However, using the right concealer can enhance your features and color correct any unevenness in skin tone, or quite frankly, to hide that zit that always creeps up on us every month! As always, check out my essentials page for recommendations. What to look for in a concealer: 1. Texture: Concealers come in various forms- stick form, in a tube with a doe foot application, or as a cream in a pot or compact. All these forms are great and serve a purpose in ease of application, but what's important is that it feels creamy on the skin and can be easily blended into the applied area without tugging on the skin. The last thing you want to do is wear an under eye concealer that is so drying that every fine line and wrinkle is not only put on display, but seem to multiply as the day progresses! 2. Color: Concealer is used to cover blemishes, highlight areas of the face when contouring, and to cancel out uneven skin tone, such as redness or dark under eye circles. For blemishes, choose a color that matches your natural skin tone. Since concealers are meant to be thicker than foundation, the added coverage will help in the cover up. For highlighting, choose a color 2 shades lighter than your natural skin tone to accentuate areas of your face that you want to bring out (under eyes, bridge of nose, cupids bow, forehead). For covering dark under eye circles, you want to cancel out the tone of the skin with a complimentary color. For example, dark circles can have a purple or green hue to them, so a color that could correct that would be a salmon or peach toned concealer. This color will neutralize the dark areas and bring balance to the face. For redness, a yellow tone concealer works great to neutralize the red undertones that want to come through your natural skin tone. 3. How to apply: Concealer can be applied with a beauty sponge, makeup brush, or your very own fingers. Brushes are great when used to spot correct. Sponges work well when you are covering a larger area, such as under the eyes. One tip I have when using sponges is to completely immerse the sponge in water, squeeze all excess water out, and then apply concealer. The dampness of the sponge helps the product move into the skin easier than a dry sponge would. I tend to lean on using my fingers because the warmth of our hands help the product warm up and really blend into the skin. Whichever way you choose, remember that you want the product to blend into your skin and not into your applicator. So let's all give concealer a chance and remember- makeup is to enhance the beauty thats already there. But when life throws you a zit, or in my case, a newborn that likes to party in her crib at night, concealer is there to save the day! I've always had this running joke that when people would say "wow you look great!" after each of my children were born, I would reply "Thanks, its my concealer. It's like the eighth wonder of the world!" If you're a mom, you know the weariness that comes with caring for newborns- the long days and the sleepless nights. After my daughter was born, I think I used more concealer in these past 6 months then my years of makeup put together!! Add in the fact that I've entered my thirties and concealer is on my list of staples in my everyday makeup routine. Even if you're not a mom or haven't entered your thirties, concealer is a great product that I often see is overlooked or seen as a product for only the "mature" woman. Concealer can not only be used for under eye circles, but also for covering blemishes, to even out skin tone, cancel out redness, or for the use of highlighting the face. For recommendations on some of my favorite concealers, check out my essentials page, and stay tuned for another product spotlight where I'll discuss what kind of concealer to use and how and where to apply it. I had to replace my face powder last week and as I browsed through the endless aisles of beauty galore at my local Ulta, I stumbled upon the NYX display and picked up a long time favorite that I hadn't used in a while since I've been trying out new products. Once I applied it, I instantly remembered why I fell in love with it in the first place! It's the NYX Stay Matte But Not Flat Powder Foundation. I picked up two shades, 02 Nude, a color 2 shades lighter for a highlight to set my under eye concealer, and 07 Medium Beige for my regular face powder. It can be worn alone on top of moisturizer or face primer, or as an extra coverage setting powder on top of foundation, which is what I do. The coverage is very comparable to MAC's Studio Fix Powder, but without the hefty price tag (MAC- $27, NYX-$9.99) The MAC powder gives a very matte finish (which can be very drying on dry skin) but the NYX leaves the skin with a natural sheen, even skin tone, and is not drying, which I love since I have very dry skin! I definitely give it a 5 star rating and recommend it to all my beauty inquirers. |
Author
When I'm not spending way too much time getting ready or drooling over the newest beauty product, I'm a stay at home mom of a rambunctious 4 year old boy, a sweet baby girl we lovingly call "sissy", and a wife to my high school sweetheart. Archives
August 2014
Categories
All
|